Monday, October 28, 2013

A Visit to the D.School

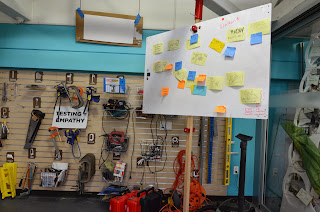
While attending FabLearn this weekend, I got to peek into the D.School's space on both Saturday and Monday, and took a TON of pictures to document the incredible space organization - to bring back to my own school as we rethink our classrooms and prepare to build an incredible new innovation space.  Here's what I found:

Flexible, comfortable space:

The giant atrium, former-alley-between-two-buildings that serves as a common space.
This is where the d.school crash course video was filmed!

Note the glass garage door to allow the space to really open up when needed.

These flexible seating benches / work tables have portable hard surfaces.
Comfy for sitting or firm for writing / laptopping.

These rolling mini-couches were plopped all around the main floor.


Well-organized public work stations:


These work stations are essentially x-channel racks 
with electrical outlets and mini-tables...
Perfect for a quick work session, finishing up 
homework, spontaneous conversations.


Group Project Spaces:

White board mini-walls suspended on tracks

LOTS of white boards!

On the other side of the walkway, smaller more-enclosed flexible work spaces.


"The Makery:


Examples of items from the MakeSpaceBook:

Pop-up wall blocks.

Z-rail white board walls

Rolling bar-height tables and cube stools

White boards hung on the wall, posts, everywhere!


Sunday, October 27, 2013

Engaging Activities for the "I'm Not Really Into Tech" Kids (And Adults!)

Today was the incredible first day of FabLearn 2013, the third Digital Fabrication in Education Conference at Stanford.  I'll have to do a full-day reflection in another post, because a full debrief of my workshop - Flashy Fashion: Engaging Activities for the "I'm Not Really Into Tech" Kids - is in order!

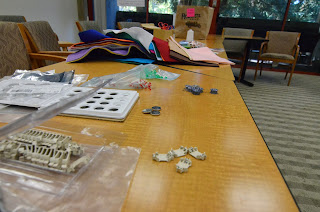
All laid out, ready to go!

Session Intro / Context Setting
Understanding the Audience
Gettin' To Work!
Mistakes = Learning Opportunities
Final Products!
Activity Materials List / Sources


The session was in the afternoon, and started with quite a light crowd... about 15 participants.  I began setting the stage by describing the context of my awesome school and how our "Maker" / Innovation / FabLab / Design Thinking program is underway.

Intro
We have had some interesting jumps along the way that have guided the goals of our program, including an unintended but firmly established culture of using glue guns for EVERYTHING, and a strong divide between the "Tech is AWESOME!" kids and the "I'm just not a tech person..." kids.  Noticing this divide is what really prompted my wonderful colleague Shaye' and I to develop and implement our "Wired For Art" course - to begin to show that technology-driven art and engineering needn't be limited to kids who have already established expertise and comfort in programming and robotics.

Thus, these activities: designing and creating one's own cute, fancy, flashy, geeky, fun accessories and crafts, learning and applying basic electronics circuitry along the way.  I prepared to give the workshop participants my big prompt:  Set aside your understanding of circuitry, and think from a kid's point-of-view.  From your playtime with MakeyMakey, you know only that a circuit has to be closed - there must be a loop for electricity to flow from one side of the battery around to the other, and hopefully you'll pass through some LEDs along the way to make them light up.

Understanding the Audience
It was really at this point that I realized that the fabulous, enthusiastic, inquisitive participants in my workshop actually wouldn't need to put on artificial student hats!  I had a couple questions I asked to gauge just how much setting-aside the crowd would need to do:
- How many of you can read a resistor without using a key? (answer: none, and one "there are people who can do that?)
- How many of you can spot why this student design idea won't work on first try? (answer: none)

"Oh, hey wait..." I said.  "This is actually a bit different from the workshop I was planning to lead..."

So, rather than jumping straight to the prompt, I pulled everyone to the tabled in the back of the room to introduce them to our materials.  I introduced our conductive thread, coin batteries and battery holders, and LEDs.  I still wasn't going to give them more info than I gave my students, and was actually pretty excited to support some fabrication-in-education enthusiastic adults in their first forays into basic circuitry!

Gettin' to Work!
After that introduction, THEN the prompt:  Create something cool!  I recommended starting with a simple wrist cuff - as I recommended to my own students - and using a snap as a switch to be able to open the cuff / open the circuit / turn off the LED.  Draw the sketch out on a piece of paper first, then grab materials and get to work!

Here are some of my participants hard at work:


Mistakes = Learning Opportunities
They ran into THE EXACT SAME CHALLENGES that my students ran into!
- running a single piece of thread across the whole circuit, shorting across the LEDs
- only connecting one side of an element - like the battery - to the circuit
- reversing the LED leads!
- tying the battery holder in such that the thread shorts between the positive and negative side
- including too many LEDs in a series circuit, with too much voltage drop to light the LEDs
- craftsman ship matters! loose, dangly threads lead to shorts or disconnects

(BTW, there are several ways to attach LED leads into your conductive thread circuit... My favorites are (1) bending the leads into loops and tying thread into the loops, or (2) folding the leads in half and looping thread through the half AND sewing around the folded lead to hold it steadily in place.)

Each of these cases opened a great opportunity for deeper learning about circuit design, including several people who ended up making parallel circuits instead to be able to light three or more LEDs with our teeny 3V batteries.

Final Products!
The session, of course, went a tad long... Everyone HAD to finish their creations!  (Andrea even finished hers during the final panel of the day, and found me to snag her picture afterwards!)  Here are a few of their proud, happy faces with their awesome LED accessories:


(Yes, that's an octopus - quadropus? - hugging a smart phone...)


Materials List / Sources

(edit: Did you land here looking for the June 2014 Design, Do, Discover page? It's here.)

You can put together a whole kit for several classes for a little more than $100!  I've had several requests for info for my materials sources, since I've managed to find my way around digikey.com, so here they are!

- lithium ion coin batteries (digikey)
- coin battery holders (digikey - these are not "sewable" and you have to use needle-nose pliers to bend the surface mount components to render them "sewable."  But MUCH cheaper)
- simple, low voltage red LEDs (digikey)
- simple, low voltage green LEDs (digikey)
- conductive thread (sparkfun)
- packs of felt (Jo-Ann Fabrics)
- packs of needles (Jo-Ann Fabrics)
- some colorful thread for decoration (Jo-Ann Fabrics)
- sewable snaps (Jo-Ann Fabrics)
- scissors
- needle-nose pliers for bending battery holder leads and LED leads (Jo-Ann or wherever)


Thursday, October 24, 2013

Seattle Women in EdTech Meetup

Wednesday evening, we had the first Seattle Women in EdTech Meetup at a coffee shop on Capitol Hill here in Seattle.  We gathered a great crew of 17 women from many different realms of EdTech, including classroom teachers, higher-ed lecturers and professors, classroom-teachers-turned-entrepreneurs, e-learning designers, and many many others!  We rooted our conversations in starting to determine WHAT our group goals might be, and what support we need from each other. Here are a few of our findings...


My small group's notes from our discussion


You can find all of the small groups' notes in a scanned PDF here.  (Yeah, I'm a teacher... big sheets of paper and markers for group note-taking!)

After discussing in small groups, we got back together to see what common desires we all had.  Most commonly cited desires included:
- group problem solving
- satisfying genuine curiosity about what we're all up to
- connecting entrepreneurs and educators
- identify "trendy" edtech vs that with potential for real change
- share resources, knowledge, skills

You can find my notes trying to track all the different ideas here.

Some of the most exciting and innovative ideas for future meeting topics included:
- developing venues for continued communication.  You can join our new LinkedIn Group - Seattle Women In EdTech #EdTechXX #LeanInEDU here! And also follow our new hashtag: #EdTechXX
- defining what *is* EdTech, and brainstorming ways to reach out to those who need the group but either might not be able to find it or might not realize that their needs fall under our umbrella.

We wrapped up with just open time for connecting and chatting!  Our event was supposed to end at 8pm, but - when I left at 8:30pm - the party was still rolling!  I don't know when everyone finally trickled out of the back room of that coffee shop, but I know we have a LOT of enthusiasm moving forward!

Our next meetup - at an as-yet-undetermined-date-and-place - will be a mini-presentations event at which all participants will share their own view of the Seattle edtech landscape, so that we can begin to put together a big-picture view incorporating all of our perspectives.  A central part of those presentations should be:

What do YOU see as "trendy" or "flash in the pan" and what do YOU see as offering real and lasting improvements in education?

You can also join the Seattle EdTech Meetup to be kept up-to-date on EdTech happenings in the Seattle area, including Women In EdTech events and events for the broader community!

Tuesday, October 8, 2013

#MakerEd Class: Success! And Assessment?

Today was @swhitmer_edu 's and my 4th #MakerEd class - Wired For Art... well enough into some making that kids are starting to really get frustrated, and some are starting to really see the fruits of their labor!

The kids' first *real* assignment (beyond Day 1: MakeyMakey Play!) has been to figure out circuitry to make an LED-illuminated wrist cuff.  See below for some awesome success!


A few cool notes: The bottom left cuff was the first one completed!  That one was incredibly proud young lady!  The upper right is a light-up PopTart cuff... seriously!  And, perhaps most importantly, note the blue and purple cuff in the lower right...

About 20 minutes before, the young lady wearing that cuff was loudly lamenting "I'll never get it to work! I don't get it!  I can't do it!" @swhitmer_edu and I took turns walking her through checking the leads on her LEDs, looking for shorts, and alternately just ignoring her and saying "keep working in it... you'll find it."

As you can see above, it worked!  She replaced a busted LED and trimmed some loose conductive thread that was causing shorts and - lo! - her LED lit up like a charm!

This afternoon, we decided it was time to nail down some specific "goals" for the course, in the interest of knowing what we'll be looking for when it comes time to write reports.  In keeping with #MakerEd assessment not being about using the right number of LEDs or using just so many series circuits vs parallel circuits, here's what we came up with:


Basically: make something cool, make it well, persevere, and explain how it works!  (And, since our class is called Wired For Art, it's gotta be electronic at this point... Makey, LEDs, Arduino, whatevs.)

Props to our kids and feedback on our assessment goals are both welcome!