Showing posts with label Maker. Show all posts

Wednesday, March 26, 2014

Semester 2 of "Wired For Art" #MakerEd

We began semester 2 - a new round of "Wired For Art" - back in the beginning of February, with a few tweaks to get the kids' skills built up a bit more before launching into their personal projects.  Here's been our structure so far:

Week 1 - MakeyMakey intro and playtime
Week 2 - Intro to parallel v series circuits with alligator clip wires and LEDs
Week 3 - Coppertape circuit art
Week 4 - finish coppertape circuits and install laptop updates in prep for 3D printing

(Week 5 hasn't happened yet... we've lost a couple weeks due to student conference days and a student musical performance, but it will be a guest-speaker workshop on 3D printing, and their last teacher-directed project will be a soft circuit cuff with a personal 3D designed/printed "medallion" to hold the LED... Gonna be rad!)

Here are some of our outcomes so far:

MakeyMakey intro and playtime:


Coppertape Circuit Art! (Yes, that's a light-up "POOP" in the bottom left corner of the collage.)


Thursday, February 27, 2014

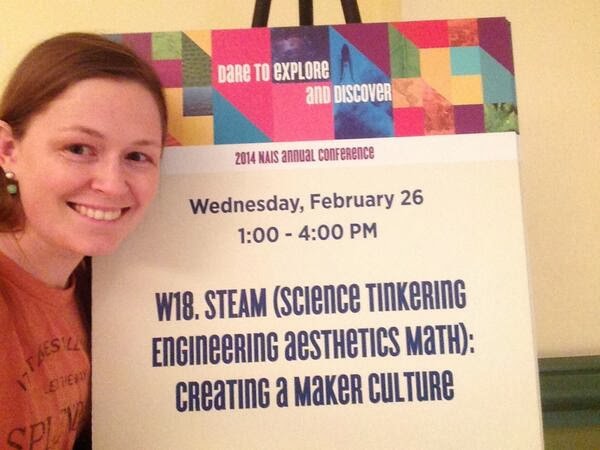
#MakerEd at #NAISac14!

Yesterday, I delivered a workshop with Vinnie Vrotny, Jaymes Dec, and Andrew Carle on Maker Education to over 40 people at the National Association of Independent Schools conference!  It was AWESOME!

Found the room Tues evening!

Everyone really started pouring in at about 12:50, and Vinnie launched at 1pm with introductions to the team, and introduction to the importance of kids persevering through tough hands-on projects, designing and creating for themselves, and experience the art and science of engineering even with the simplest materials... A very brief intro, and then we showed our stations!
- Paper Speakers
- Sewn Circuits
- MakeyMakey
- Copper tape circuits
- Lego WeDo Rube Goldberg devices

(Have you ever used Fotor to make collages? So fun...)

Our participants spread out and dove into their projects by 1:20.  Most participants spent a solid 20 to 30 minutes at each station, creating their speakers, wonderful unique MakeyMakey controllers, cute sewn LED circuit accessories, copper tape circuits, and intricate Rube Goldberg devices.  A few people stayed intensely focused on one session for the full 2+ hours, like a few on the Rube Goldberg team!

Here is the brief intro guide I made for the Sewn Circuits table:

Find my materials/sources list for Sewn Circuits activities here!


Paper Speakers:


(I want to a see the video of this teeny speaker in action!)

Sewn Circuits - hard at work!


Sewn Circuits - a couple finished products!


Copper tape circuits:


MakeyMakey Projects!

A demo Drum Shirt made by one of my 6th gr girls


Four-player Pac Man


 Participant-created controllers, including my new fave kit element: gloves!

Rube Goldberg device:

Ball rolls down ramp, triggers WeDo motion sensor, WeDo lifts lever, knocks over dominoes, 
domino falls onto lever on floor, launches astronaut lego people!


Wrap-up

As a presenter, I had a FANTASTIC time supporting teachers in exploring these different tools, creating their own unique items, and growing their perseverance, prototyping, and grit!  In our wrap-up, Vinnie shared a ton of resources that we'll make available here, and participants shared their learning.  Wonderful share-outs included anecdotes of developing their own confidence in this type of building, discussions of pedagogy of supporting such open-ended exploration, and ideas for getting started back at participants' own home schools!


My own new learning:
One participant shared a great new acronym that I'm hoping to bring home with me... Instead of "STEAM" (which is too science/tech focused), their school uses "IDEA" - Innovation, Design, Engineering, and Art! I like that focus on design, as well as rolling "technology, science and math" of STEAM (and "robotics" if you're "STREAM") all into "Engineering," since that's really what it's all about!


Sunday, October 27, 2013

Engaging Activities for the "I'm Not Really Into Tech" Kids (And Adults!)

Today was the incredible first day of FabLearn 2013, the third Digital Fabrication in Education Conference at Stanford.  I'll have to do a full-day reflection in another post, because a full debrief of my workshop - Flashy Fashion: Engaging Activities for the "I'm Not Really Into Tech" Kids - is in order!

All laid out, ready to go!

Session Intro / Context Setting
Understanding the Audience
Gettin' To Work!
Mistakes = Learning Opportunities
Final Products!
Activity Materials List / Sources


The session was in the afternoon, and started with quite a light crowd... about 15 participants.  I began setting the stage by describing the context of my awesome school and how our "Maker" / Innovation / FabLab / Design Thinking program is underway.

Intro
We have had some interesting jumps along the way that have guided the goals of our program, including an unintended but firmly established culture of using glue guns for EVERYTHING, and a strong divide between the "Tech is AWESOME!" kids and the "I'm just not a tech person..." kids.  Noticing this divide is what really prompted my wonderful colleague Shaye' and I to develop and implement our "Wired For Art" course - to begin to show that technology-driven art and engineering needn't be limited to kids who have already established expertise and comfort in programming and robotics.

Thus, these activities: designing and creating one's own cute, fancy, flashy, geeky, fun accessories and crafts, learning and applying basic electronics circuitry along the way.  I prepared to give the workshop participants my big prompt:  Set aside your understanding of circuitry, and think from a kid's point-of-view.  From your playtime with MakeyMakey, you know only that a circuit has to be closed - there must be a loop for electricity to flow from one side of the battery around to the other, and hopefully you'll pass through some LEDs along the way to make them light up.

Understanding the Audience
It was really at this point that I realized that the fabulous, enthusiastic, inquisitive participants in my workshop actually wouldn't need to put on artificial student hats!  I had a couple questions I asked to gauge just how much setting-aside the crowd would need to do:
- How many of you can read a resistor without using a key? (answer: none, and one "there are people who can do that?)
- How many of you can spot why this student design idea won't work on first try? (answer: none)

"Oh, hey wait..." I said.  "This is actually a bit different from the workshop I was planning to lead..."

So, rather than jumping straight to the prompt, I pulled everyone to the tabled in the back of the room to introduce them to our materials.  I introduced our conductive thread, coin batteries and battery holders, and LEDs.  I still wasn't going to give them more info than I gave my students, and was actually pretty excited to support some fabrication-in-education enthusiastic adults in their first forays into basic circuitry!

Gettin' to Work!
After that introduction, THEN the prompt:  Create something cool!  I recommended starting with a simple wrist cuff - as I recommended to my own students - and using a snap as a switch to be able to open the cuff / open the circuit / turn off the LED.  Draw the sketch out on a piece of paper first, then grab materials and get to work!

Here are some of my participants hard at work:


Mistakes = Learning Opportunities
They ran into THE EXACT SAME CHALLENGES that my students ran into!
- running a single piece of thread across the whole circuit, shorting across the LEDs
- only connecting one side of an element - like the battery - to the circuit
- reversing the LED leads!
- tying the battery holder in such that the thread shorts between the positive and negative side
- including too many LEDs in a series circuit, with too much voltage drop to light the LEDs
- craftsman ship matters! loose, dangly threads lead to shorts or disconnects

(BTW, there are several ways to attach LED leads into your conductive thread circuit... My favorites are (1) bending the leads into loops and tying thread into the loops, or (2) folding the leads in half and looping thread through the half AND sewing around the folded lead to hold it steadily in place.)

Each of these cases opened a great opportunity for deeper learning about circuit design, including several people who ended up making parallel circuits instead to be able to light three or more LEDs with our teeny 3V batteries.

Final Products!
The session, of course, went a tad long... Everyone HAD to finish their creations!  (Andrea even finished hers during the final panel of the day, and found me to snag her picture afterwards!)  Here are a few of their proud, happy faces with their awesome LED accessories:


(Yes, that's an octopus - quadropus? - hugging a smart phone...)


Materials List / Sources

(edit: Did you land here looking for the June 2014 Design, Do, Discover page? It's here.)

You can put together a whole kit for several classes for a little more than $100!  I've had several requests for info for my materials sources, since I've managed to find my way around digikey.com, so here they are!

- lithium ion coin batteries (digikey)
- coin battery holders (digikey - these are not "sewable" and you have to use needle-nose pliers to bend the surface mount components to render them "sewable."  But MUCH cheaper)
- simple, low voltage red LEDs (digikey)
- simple, low voltage green LEDs (digikey)
- conductive thread (sparkfun)
- packs of felt (Jo-Ann Fabrics)
- packs of needles (Jo-Ann Fabrics)
- some colorful thread for decoration (Jo-Ann Fabrics)
- sewable snaps (Jo-Ann Fabrics)
- scissors
- needle-nose pliers for bending battery holder leads and LED leads (Jo-Ann or wherever)


Tuesday, October 8, 2013

#MakerEd Class: Success! And Assessment?

Today was @swhitmer_edu 's and my 4th #MakerEd class - Wired For Art... well enough into some making that kids are starting to really get frustrated, and some are starting to really see the fruits of their labor!

The kids' first *real* assignment (beyond Day 1: MakeyMakey Play!) has been to figure out circuitry to make an LED-illuminated wrist cuff.  See below for some awesome success!


A few cool notes: The bottom left cuff was the first one completed!  That one was incredibly proud young lady!  The upper right is a light-up PopTart cuff... seriously!  And, perhaps most importantly, note the blue and purple cuff in the lower right...

About 20 minutes before, the young lady wearing that cuff was loudly lamenting "I'll never get it to work! I don't get it!  I can't do it!" @swhitmer_edu and I took turns walking her through checking the leads on her LEDs, looking for shorts, and alternately just ignoring her and saying "keep working in it... you'll find it."

As you can see above, it worked!  She replaced a busted LED and trimmed some loose conductive thread that was causing shorts and - lo! - her LED lit up like a charm!

This afternoon, we decided it was time to nail down some specific "goals" for the course, in the interest of knowing what we'll be looking for when it comes time to write reports.  In keeping with #MakerEd assessment not being about using the right number of LEDs or using just so many series circuits vs parallel circuits, here's what we came up with:


Basically: make something cool, make it well, persevere, and explain how it works!  (And, since our class is called Wired For Art, it's gotta be electronic at this point... Makey, LEDs, Arduino, whatevs.)

Props to our kids and feedback on our assessment goals are both welcome!

Tuesday, September 24, 2013

Starting a #MakerEd Class For Middle School

So I'm cheating a bit to really call this a #MakerEd course... It's not *completely* wide-open creation, and it's also not open to everyone.  Technically, @swhitmer_edu and I are teaching a fine arts course entitled "Wired For Art" that engages students in applying basic circuitry to creating personal art - garments, games, furniture, light sabers, whatever...  But we are indeed focused on basic circuitry, so I think a few might balk at our calling it #MakerEd...

That said, our class is ROCKING!

The class meets once per week for an hour and a half... Tuesday mornings, 8:30-10.  The class will run for about 13 weeks, from early September until late January.  Our current plan is to spend 4-5 weeks introducing tools, and then have the kids design and implement their own projects branching out from the tools they've been experimenting with.

Week 1

The first week, we introduced MakeyMakey and challenged students to create a few fun games using that awesome invention kit.  We gave them several dozen bananas and many rolls of aluminum foil, and pulled up several pre-selected Scratch games.

A basic up-down-left-right game controller

Getting more complicated: A DanceDanceRevolution Board

Coolest Day 1 Application: Finger Piano! 
Note the necessary latex glove to isolate each finger.

Week 2

The second week, we introduced a second set of tools: sewable LED circuits. We're giving the kids two weeks to create a simple snap-on cuff out of felt that includes approximately 3 LEDs in series.  Prior to our course, I modified a hoody to include 4 LEDs, so that was my demo to show how the battery holders sew into the circuit, how to loop the ends of the LEDs, how to stitch in the thread, etc.

My LED hoody, which coincidentally is the publicity image 
for my workshop at the upcoming FabLearn.

The kids sketched out their plans for their cuffs (or belts, or patches, or - in one case - frisbee), then returned to show and gather their materials.  We only had to send a few kids back to add a bit of detail to their sketches, like *where will the conductive thread actually GO?* We didn't do any formal schematic drawings at all, but just looked for acknowledgement that the circuit would need to close.

A student's "schematic" showing her double-strap bracelet with LEDs on
one strap, and snaps to complete the circuit.

Another student's slightly-more-fancy "schematic" showing her Iron Man hand
with palm LEDs and the battery held behind the thumb.

The kids aren't very far along yet, but are making progress!  They've made mistakes to lead them towards paying attention to positive/negative leads on the LEDs, and are improving in their stitching skills. (I straight up nixed one student's desire to hold his whole thing together with masking tape! Is that counter to #MakerEd dogma?) I was impressed with their diagramming skills, but not yet with their craftsmanship skills.  Befitting highly-verbal, "gifted" students who read a lot and don't get their hands dirty often... they can draw out amazing, creative, beautiful ideas and quickly get stuck on implementation.

I'm ready to fix that!